
When you are waiting your turn at the beauty salon, do you simply get amazed at how easily and effortlessly the salon professionals employed there make their client’s hair look great as they blow dry it? Well then maybe it’s time you learn to amaze yourself at home by blowing drying your hair the same way that professionals do it. It’s much easier than you think and you can do it by simply doing the following easy steps.
Also, check out our picks for the best professional hair dryers!
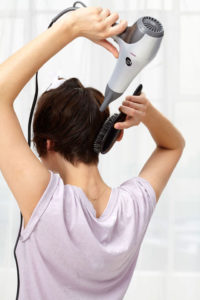
How to Professionally Blow Dry Hair (Step by Step Guide)

Step 1: Before you start blow drying
It’s no secret that the longer it takes to blow dry your hair the more you risk damaging it. Heat is your friend when it comes to drying and styling your hair but too much can dry it out and make it look lifeless. That is one of the reasons why salon professionals recommend lightly towel drying your hair until it’s only slightly damp (70-80% dry) before you start to use your hair dryer.
If you have fine or thin hair it is never a bad idea to use a salon quality leave-in conditioner during your shampooing process or protecting your hair before the blow drying process by adding a ‘small amount’ of protective oil such as argan oil.
Step 2: Choose the right hair dryer
People who style hair for a living know how important it is to use a good quality hair dryer when drying and styling hair. That is why they most often choose very versatile hair dryers. These dryers will usually have several heat and speed settings so they can be properly matched up with the type of hair that is being dried. If you have sensitive fine or thin hair you will definitely want a hair dryer model that has low and medium heat settings.
Step 3: Choose the right hairbrush
 A right hairbrush is also an essential tool when you are trying to get your hair to look great when you are blow drying and styling it. Flat paddle type brushes work great when you are trying to get a straight hair look and round hair brushes are best for adding volume and curl. It’s never a bad idea either to ask the professional stylist that does your hair what type of hairbrush they recommend you use when blow drying it.
**Hot tip: Avoid using brushes with metal bristles because they can build up static electricity and they can build up too much heat and damage your hair.**
Step 4: Section your hair
You won’t see any salon professionals trying to dry a whole head of hair at once because they know that simply does not work well. They will section their client’s hair before they blow dry it and that is exactly what you need to do also. It works best to section your hair into at least three sections; the nape, the middle and the top layer. Bangs can be left unsectioned.
Step 5: Dry your bangs first
Dry your bangs first or they could dry on their own before you have a chance to shape them and if they do that they will become unruly.
Step 6: Start next with the roots
 It is important to start the major part of the hair drying process with the roots first. Most people incorrectly do not do this and then the roots stay moist and it makes it harder to style your hair.
Don’t use the hairbrush at this point of the process either. Only use your fingers. As you dry your hair use your fingertips in a scratching, circular motion on your scalp to help separate the damp roots so they all get completely dry.
This is by far the most important part of the hair drying process if you want your hair to look great when you are done blow drying and styling it.
**Hot tip: no matter which part of your hair you are drying always point the hair dryer down the shafts of your hair towards the scalp. This makes sure you get the entire length of your hair dry and also helps avoid overdrying and damaging the ends of it.**
Step 7: Dry the rest of your hair next
Once the roots are dry you can then proceed to dry the rest of your hair continuing to face the dryer down the shaft towards your scalp. Once again be careful not to over dry your hair because it may cause frizz or split-ends which will ruin the end look.
Step 8: Use the Cool Shot Button Often
It never hurts to hit the areas of your head with a quick shot of cool air after you have it dried and set in place so it stays where you want.
Drying Tips Based on Hair Length
 Short hair
People often make the mistake of thinking there is no special technique for drying short hair. Those are the people you see walking around with short hair that does not look good. Finger dry your roots first then use a flat brush to sweep your hair forward on the back and sides as you dry them. Once that is done unclip the top and dry it last.- Med length hair
You will get the best blow drying results if you first do the roots, then the sides and back of your hair (try doing this without a hairbrush too). After that is done you can then unclip the top and dry it all at once. - Long hair
During the blow drying process, it’s beneficial to hold your head upside down so your long hair falls away toward the ground. This will make it much easier to dry the entire length of your hair.
 Short hair
Now You Can Have Hair That Looks Professionally Dried
If you do all these steps in the order it will go a long way toward helping you get that amazing salon finished blow drying look every day at home. Also, the next time you are waiting to get your hair done at the salon pay close attention to how each stylist blow dries their client’s hair and you will pick up, even more, helpful tips to use when you are blow drying your hair yourself.